Uploading documentation to Doctave
In order to publish your documentation, you have to upload it for Doctave to host. We make it easy for you to publish your documentation either automatically from your CI/CD pipeline, or on an ad-hoc basis.

Upload methods
When creating your site in the Doctave dashboard you will choose an upload method for your site.
There are two ways to upload your documentation to Doctave:
The upload script is great for docs-as-code and production deployments, while drag-and-drop works well for testing and getting familiar with Doctave.
Upload methods are tied to a particular version.
For example, you can have a customer-facing main version using the upload
script, and an experimental test version using the drag-and-drop method
in the same site.
You can change your upload method at any time.
Upload Script
The Doctave upload script is the preferred way to upload your documentation:
# Ensure you're in the same directory as your doctave.yaml file
cd /path/to/my/project

# Invoke the upload script
curl -L -s http://dashboard.doctave.com/doctave-upload.sh | bash -s -- .
The script will:
- Check Git which branch and commit you are on
- Bundle up your documentation
- Send it to Doctave along with the commit information
Once Doctave receives your documentation, it will create a build for the new revision of the content.
Upload tokens
In order for Doctave to know which site your content belongs to, each site has a unique upload token.
When you execute the script, you need to ensure isn't available in your terminal's environment:
export DOCTAVE_UPLOAD_TOKEN="<your site's token>"Finding your upload token
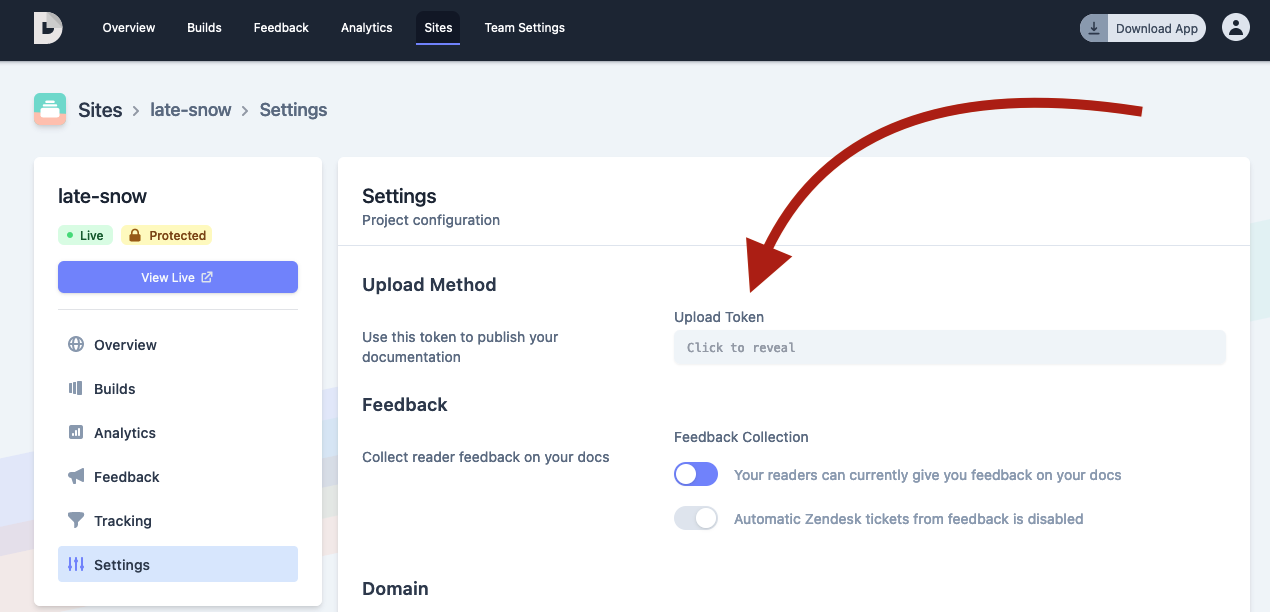
Your upload token can be found in your site's settings in the Doctave dashboard.
- Go to your sites
- Click on "Configure" for your site
- Click on "Settings" in the left site navigation
Your upload token can be revealed by clicking the input field.

Drag and drop manual upload
The easiest way to upload your documentation is by dragging and dropping your project directory into the Doctave dashboard. This is useful if you want to experiment with a project that's not in a Git repository. However, Doctave recommends using Git for production environments.
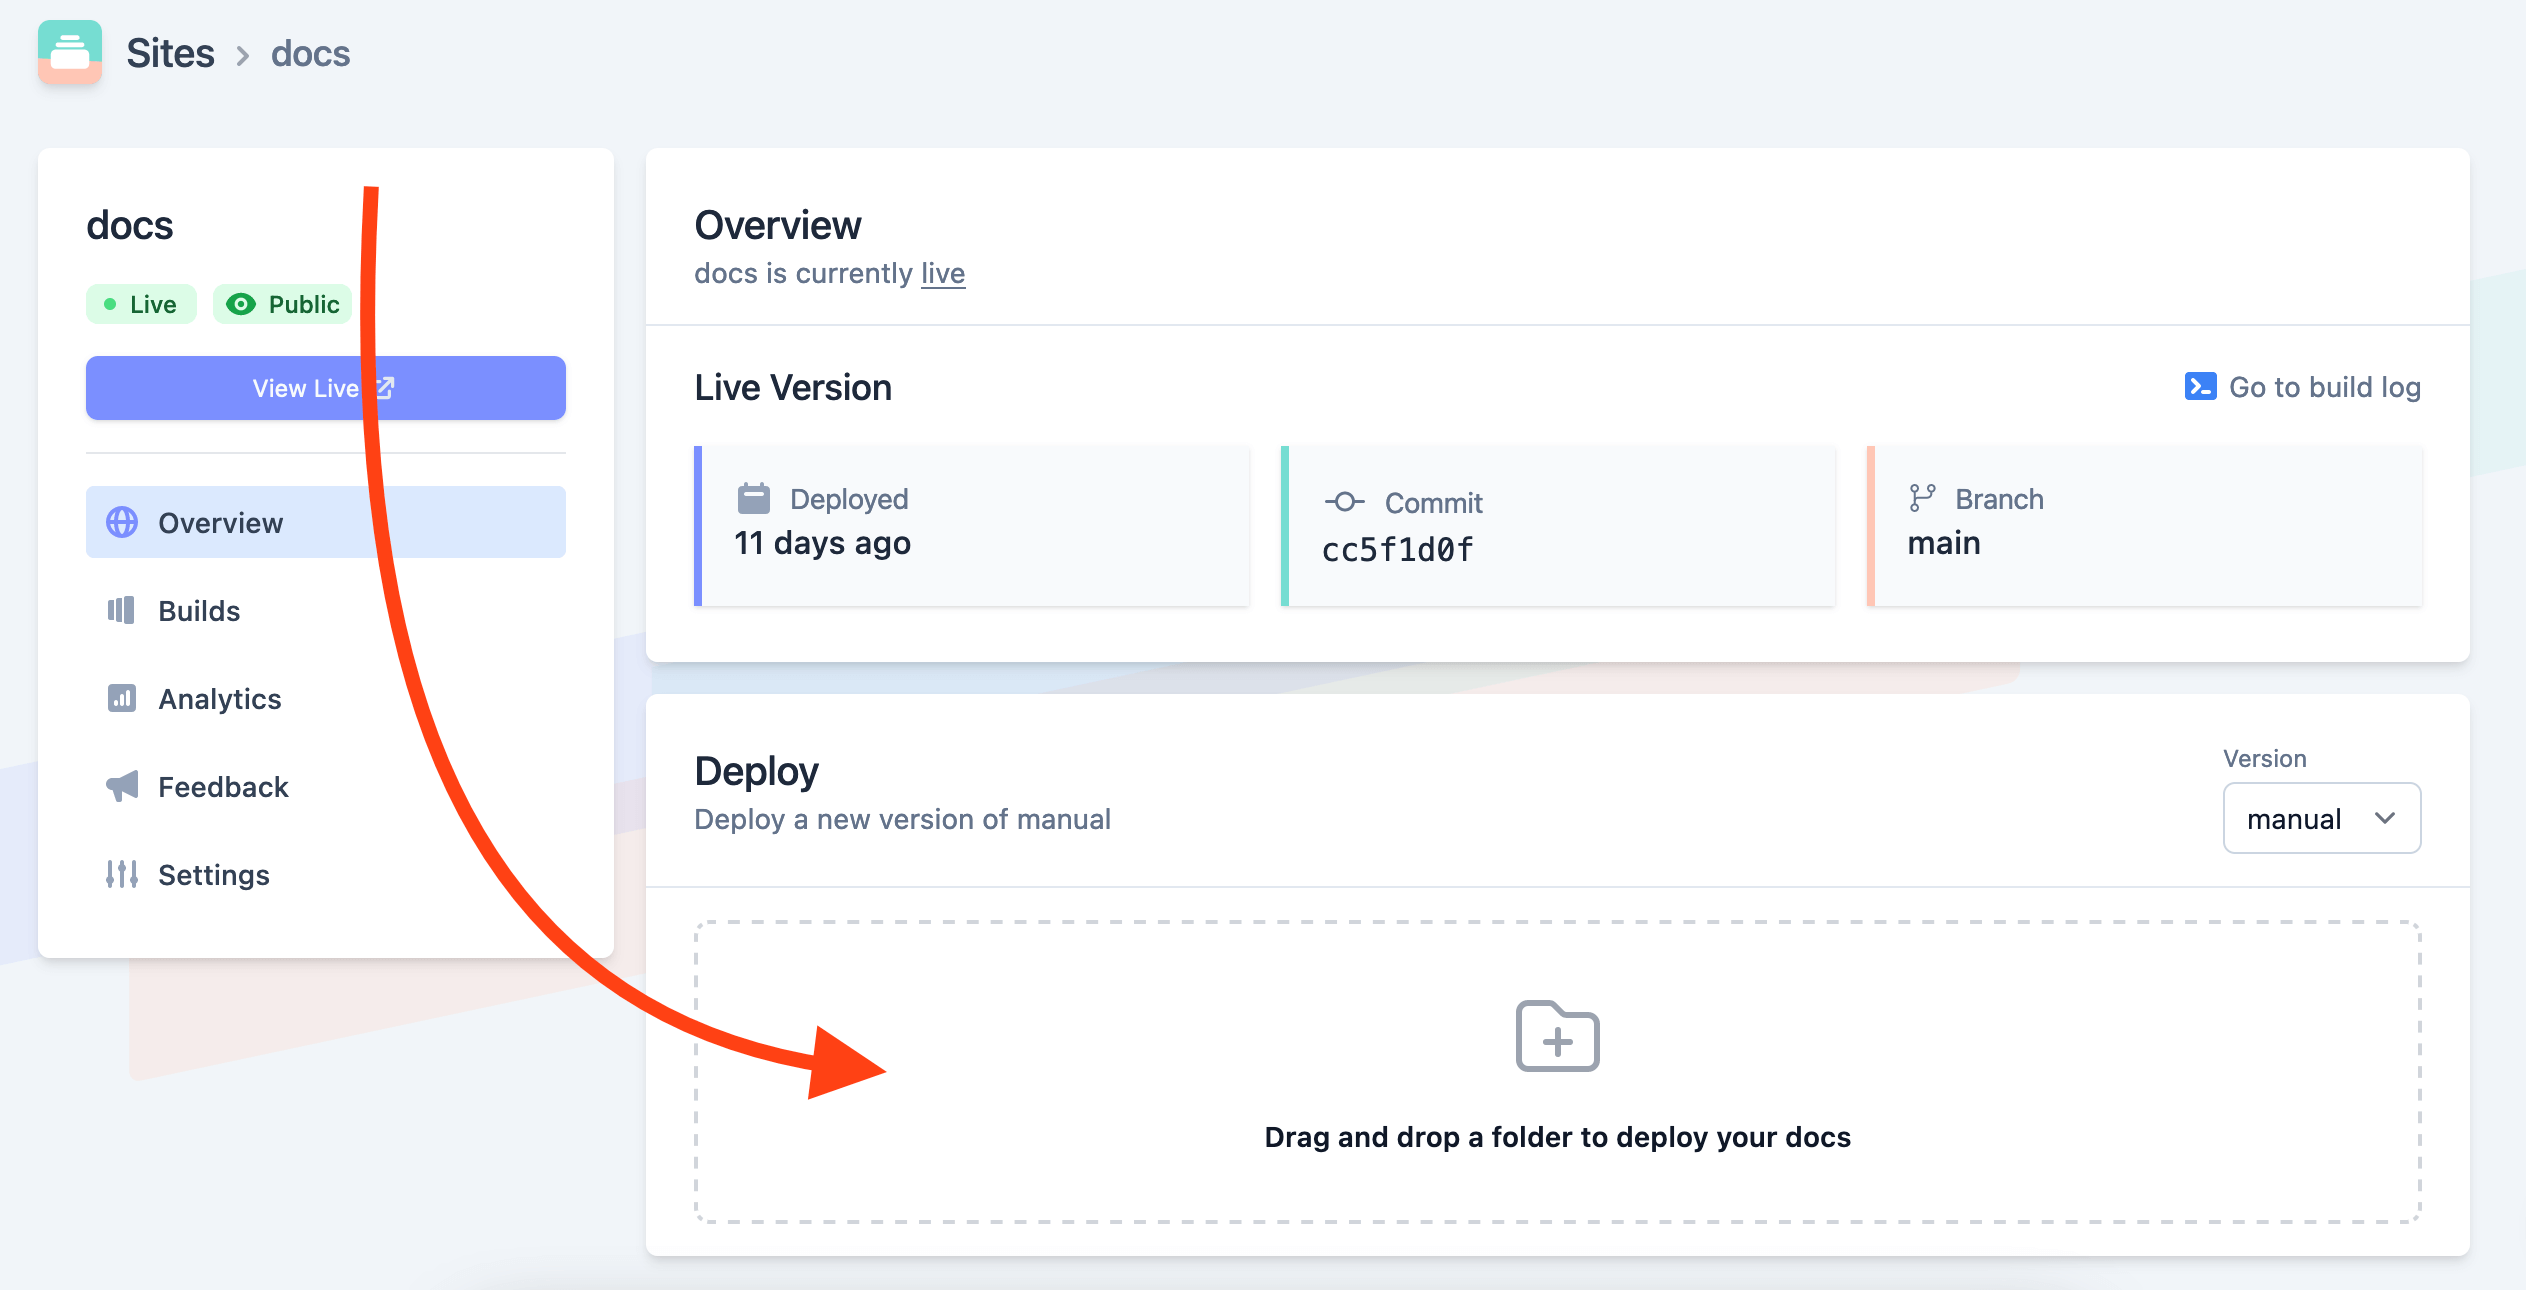
When using the drag-and-drop upload method, you can drag the folder from your computer into the Doctave dashboard, and Doctave will create a new build from the files.
NOTE! Git branches and commits aren't tracked when using this upload method. Use the upload script upload method if you want to track Git information across your documentation changes.
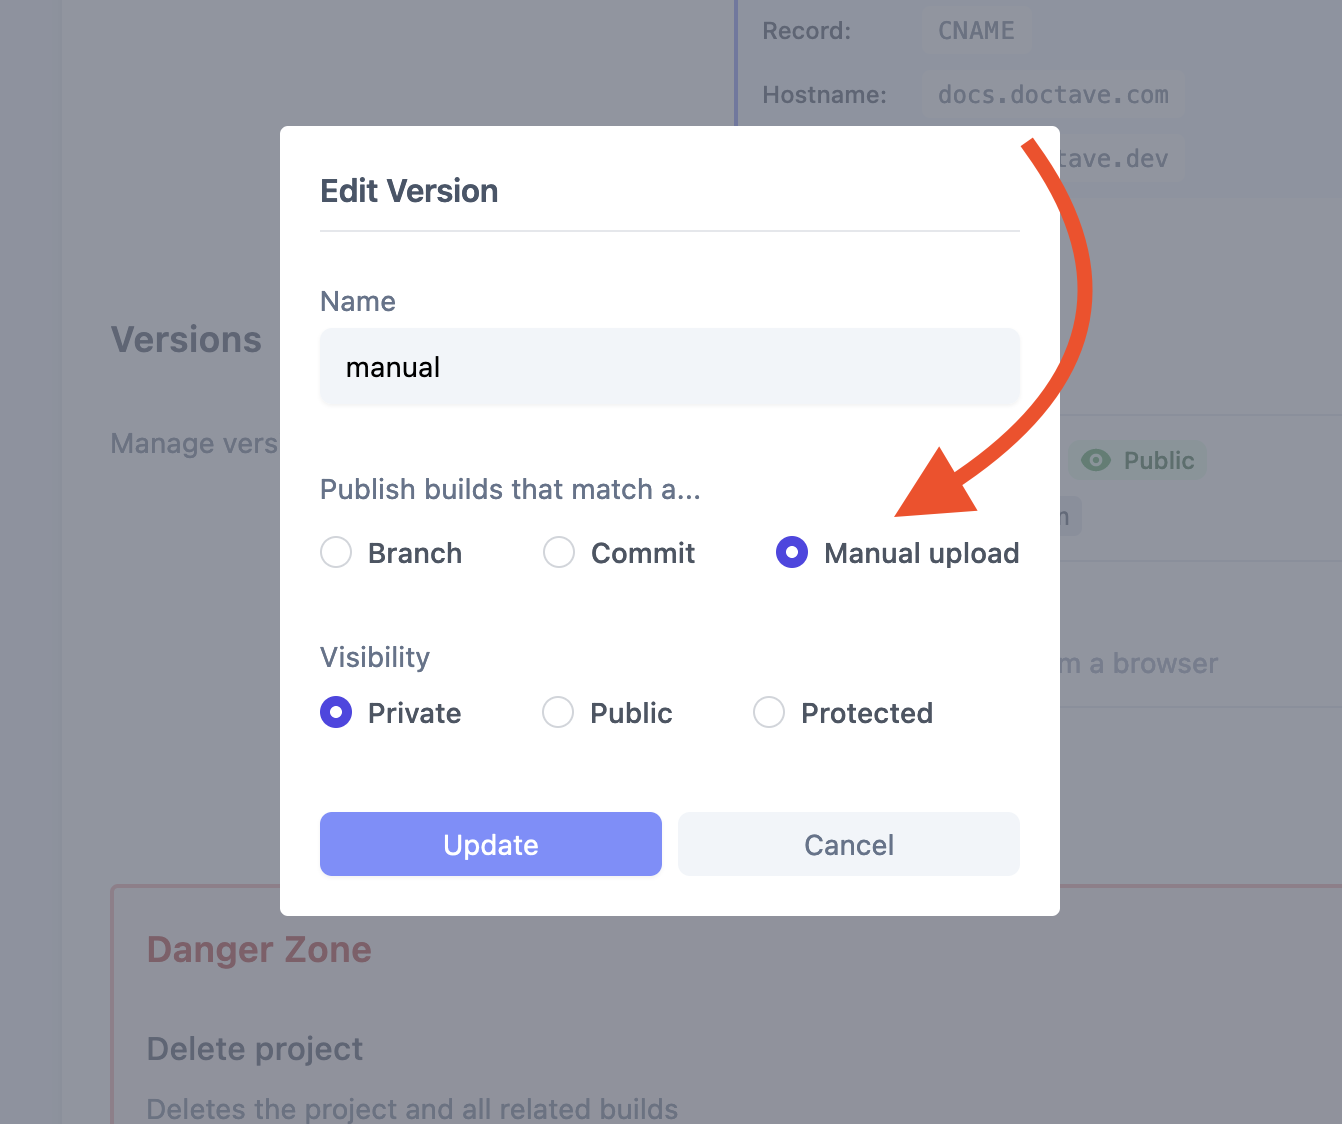
- Set your version to match manual uploads
- Navigate to your site's overview page
- Select the correct version from the version dropdown
- Drag and drop your project directory into the upload area

Changing your upload method
We've a separate guide for upgrading from a drag-and-drop workflow to a Git-based workflow with the upload script: changing from drag-and-drop to the upload script ›
If you are currently using the upload script and want to change to the drag-and-drop method do the following steps:
- Go to your sites
- Click on "Configure" for your site
- Click on "Settings" in the left site navigation
- Select the Version you want to update the upload method for, or create a new version
- Select the "manual upload" method for this version

Was this page helpful?

